There is an undeniable magic to bringing nature indoors. Having a garden, even a tiny one on a windowsill, is scientifically proven to be good for your health. It is not only about getting fresh air; plants are powerful stress relievers that can lower anxiety and boost productivity. However, let’s face reality: not everyone has a sprawling backyard or acres of land.
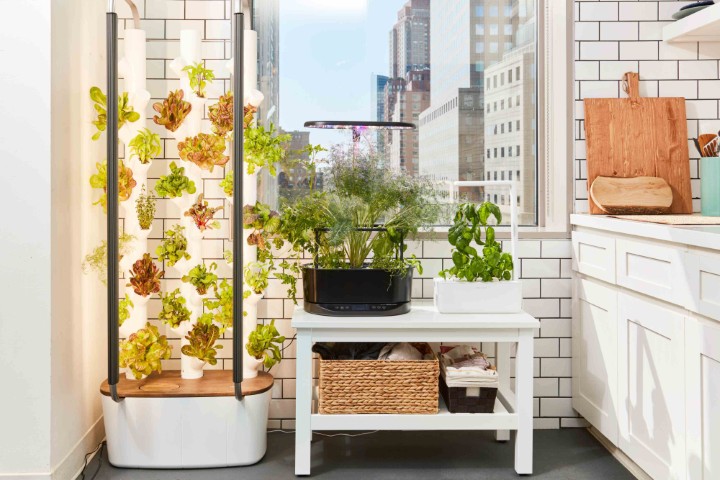
For apartment dwellers and those with limited space, container gardening is the perfect solution. Using pots allows you to bring the outdoors in, placing greenery in the kitchen, near the bedroom window, or right on your working desk. But why settle for the standard, boring terracotta orange or plain plastic containers?
Decorating a flower pot is a fantastic way to personalize your space. It transforms a simple vessel into a piece of art that reflects your personality. Furthermore, if you think planting requires a “green thumb” or special skills, you might be surprised. The main requirement is simply a sense of responsibility. Planting encourages discipline—watering, pruning, and nurturing. If you find the routine of plant care challenging, having a beautiful, hand-decorated pot can be the motivation you need to keep going. When you love the pot, you are more likely to remember to water the plant inside it.
In this comprehensive guide, we will explore everything you need to know about container gardening—from the science of plant growth to 10 fun and creative ideas for decorating a flower pot.
What a Plant Needs to Grow
Before we dive into the paints and glues, it is vital to understand the “client”—your plant. You can have the most beautifully decorated pot in the world, but if it doesn’t support the plant’s biology, your hard work will go to waste.
When you choose a pot to decorate, you are choosing a home for a living organism. Here are the four critical factors you must consider to ensure you see fresh green leaves and colorful blooms:
-
Water and Nutrients: The Fuel
Just like humans, plants require food and hydration. However, a plant’s dependency on water is far greater than ours. Water makes up nearly 90% of a plant’s composition. Even the desert cactus, which looks dry and tough, relies on stored water to survive. Water is the vehicle that transports essential nutrients—Hydrogen, Oxygen, and Carbon—from the soil to the leaves.
The Pot Connection: When decorating, ensure you do not block the drainage hole at the bottom of the pot. Without drainage, water sits at the bottom, causing “root rot,” which kills the plant. If you paint a pot, be aware that unsealed terracotta absorbs water, potentially drying out the soil faster, while painted/sealed pots retain moisture longer.
-
Light and Temperature: The Energy Source
Once the plant is watered, it needs sunlight to process that water into energy through photosynthesis. The amount of light required depends on the species (e.g., succulents need bright light; ferns prefer shade).
The Pot Connection: Dark-colored pots absorb heat from the sun, which can cook the roots if placed in direct scorching sunlight. Light-colored pots reflect heat. Keep this in mind when choosing your paint colors!
-
Air and Soil: The Environment
Fresh, clean air allows the plant to intake carbon dioxide for photosynthesis. Meanwhile, the soil is the anchor. Healthy soil allows roots to spread and breathe.
The Pot Connection: Avoid using toxic paints or glues on the inside of the pot where they touch the soil. Always decorate the outside of the vessel to keep the soil chemical-free.
-
Space: The Room to Grow
The size of the pot matters. If a pot is too small, the roots become “root-bound,” circling each other and choking the plant. If the pot is too massive, the soil will hold too much water, leading to rot.
The Pot Connection: As you get excited about decorating, make sure you pick a pot size that fits the current stage of your plant’s life.
Preparation: Getting Your Pot Ready for Art
A professional artist never paints on a dirty canvas. Whether you are using a standard terracotta clay pot or a plastic planter, preparation is key to making your decoration last.
- For Clay/Terracotta Pots: These are porous and often dusty. Scrub them thoroughly with warm water and a stiff brush. Let them dry completely—this can take 24 hours. If you paint a damp pot, the moisture will bubble up and ruin your art later.
- For Plastic/Ceramic Pots: These surfaces are slick, so paint often peels off. Lightly sand the surface with fine-grit sandpaper to create a rough texture (or “tooth”) for the paint to stick to. Wipe away the dust with a damp cloth before starting.
Top 10 Fun Ideas to Make Your Flower Pot Look Great
Now that you understand the basics of plant care and prep, it’s time for the fun part. Here are 10 creative, accessible, and stunning ways to decorate your flower pots.
-
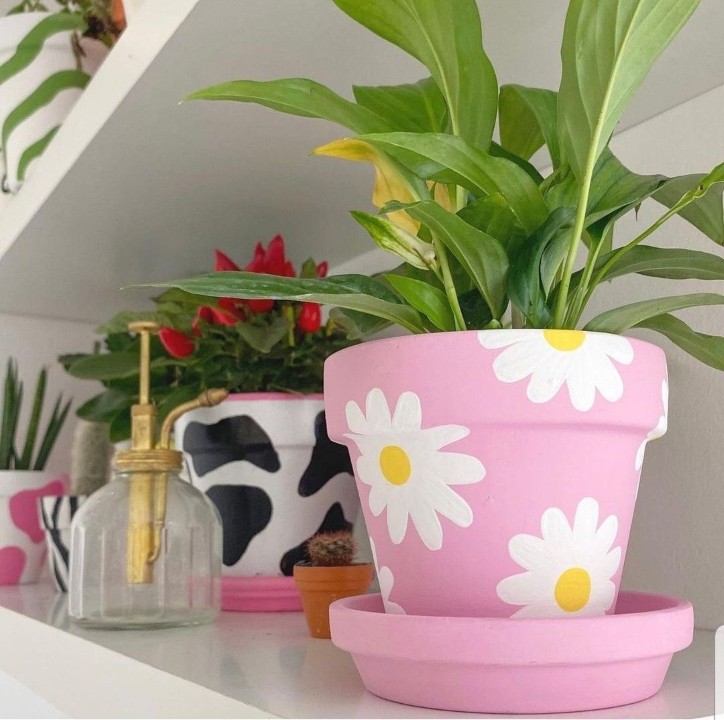
The Classic Paint Refresh
The easiest entry point into DIY pot decoration is painting a blank pot. Terracotta pots are inexpensive and provide a fantastic neutral surface.
- The Technique: Start with a base coat. White is the most flexible choice as it makes subsequent colors pop. You can use acrylic craft paints, which are cheap and come in every color imaginable.
- Design Ideas: You don’t have to be Van Gogh. Try abstract blobs, splatter paint (using a toothbrush to flick paint), or simple stripes.
- Pro Tip: If you want a cohesive look, paint a series of 3-5 pots in the same color palette but with different patterns (e.g., one striped, one polka-dotted, one solid). This creates a “collection” look for your windowsill.
-
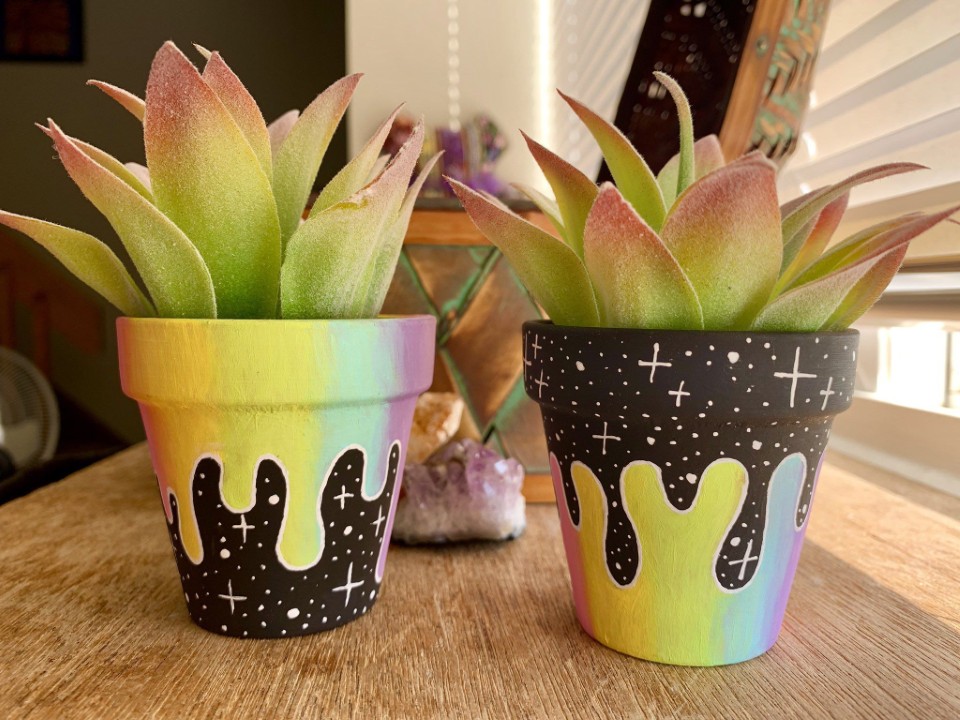
The Gradient (Ombre) Effect
Who doesn’t love a rainbow? Bringing a gradient or “ombre” effect to your garden adds a soft, modern touch that looks incredibly professional.
- The Technique: You need at least three colors: a dark shade, a medium shade, and a light shade (or white).
- Method A (Sponge): Paint the bottom third dark, the middle medium, and the top light. While the paint is wet, use a damp sponge to dab the lines where the colors meet, blending them softly.
- Method B (Spray Paint): This is the fast method. Place the pot upside down. Spray the bottom with your darkest color. Lightly spray the middle with the lighter color, holding the can further away to create a mist that blends naturally.
- Why It Works: It mimics nature (like a sunset or the ocean) and adds visual height to the pot.
-
Motivational Quotes
Sometimes, just seeing a positive word can boost your mood like a phone on a fast charger. Your plants are growing, and you should be too!
- The Technique: Paint the pot a solid, bright color like sunny yellow or sky blue. Once dry, use a paint pen (oil-based markers work best) or a sharpie to write a quote.
- Ideas: “Grow,” “Bloom Where You Are Planted,” “Keep Going,” or even funny ones like “I Will Survive” (great for plants you’ve struggled to keep alive!).
- Design Tip: If your handwriting isn’t great, print out a font you like, rub graphite on the back of the paper, tape it to the pot, and trace the letters. The graphite will transfer the outline to the pot for you to fill in.
-
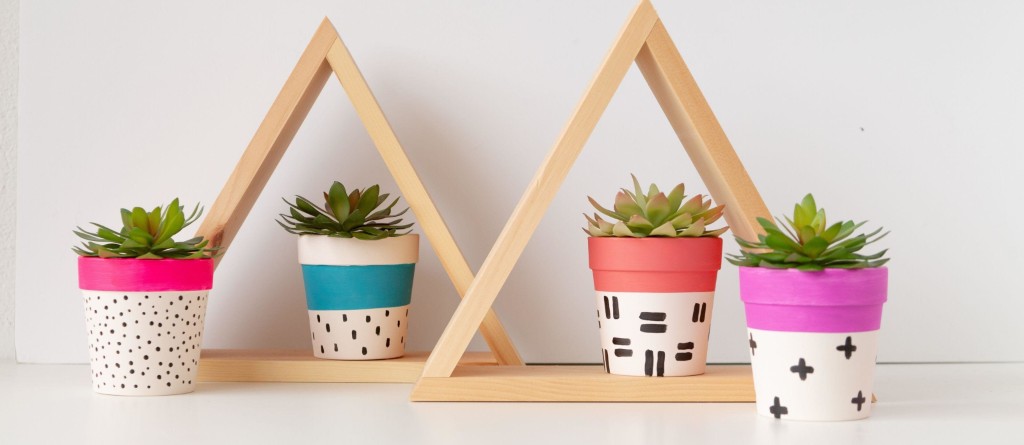
Geometry and Monochrome (Black & White)
For those who prefer a modern, minimalist, or “Scandi” aesthetic, the combination of black and white is unbeatable.
- The Technique: Use masking tape or painter’s tape. Tape off triangles, diamonds, or random geometric shapes. Paint the entire pot black, let it dry, and peel off the tape to reveal the terracotta underneath. Or, paint the pot white first, tape it, and then paint black.
- Why It Works: The high contrast of black and white makes the green of the plant leaves look incredibly vibrant. It’s a clean look that fits in modern offices and living rooms.
-
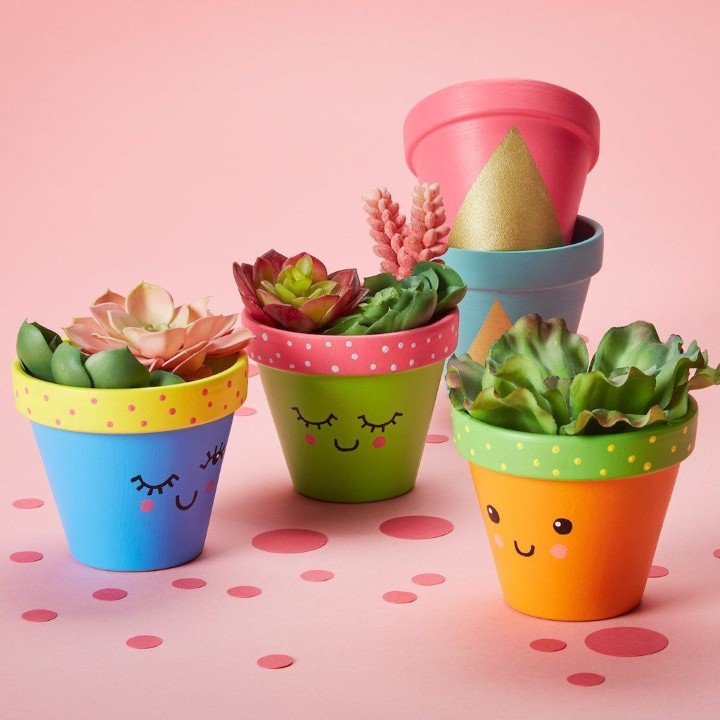
Face Line Art (Picasso Style)
Face line drawing is a huge trend in interior design right now. It looks artistic, sophisticated, and surprisingly, it is very easy to do.
- The Technique: You don’t need to be realistic. This style relies on “contour drawing”—using one continuous line to suggest a face. Paint your pot a solid matte color (terracotta, beige, or blush pink work best). Use a fine-tip black paint brush or marker to draw an abstract face.
- Creative Twist: Draw the face so that the plant becomes the “hair.” Ferns make great messy hair, while succulents look like funky spikes!
-
The Superhero Squad
Are you a Marvel fan? Or perhaps you love Star Wars? Turning your pots into characters is a fantastic project, especially if you are decorating with children.
- The Technique: Use the shape of the pot to your advantage. A standard pot turned upside down looks like a body. However, for a functional pot, simply paint the “costume” on the outside.
- Ideas: Paint a pot red and gold for Iron Man, or green for Hulk. You can even glue on felt ears for a Batman pot.
- Material Note: If you use ceramic pots, you might need a primer specifically for slick surfaces before painting your characters.
-
The Button Mosaic
Don’t worry if you can’t draw or paint. You can create a stunning 3D texture by decorating a flower pot with buttons.
The Technique: Collect buttons of various sizes and colors. You can buy bags of mixed buttons at craft stores cheaply. Use a strong adhesive like hot glue (for indoors) or E6000 glue (for outdoors/durability).
Design Ideas:
- The Scramble: Glue buttons randomly all over for a confetti look.
- The Gradient: Sort buttons by color and glue them in a gradient from dark to light.
- The Minimalist: Glue a single line of buttons around the rim of the pot.
-
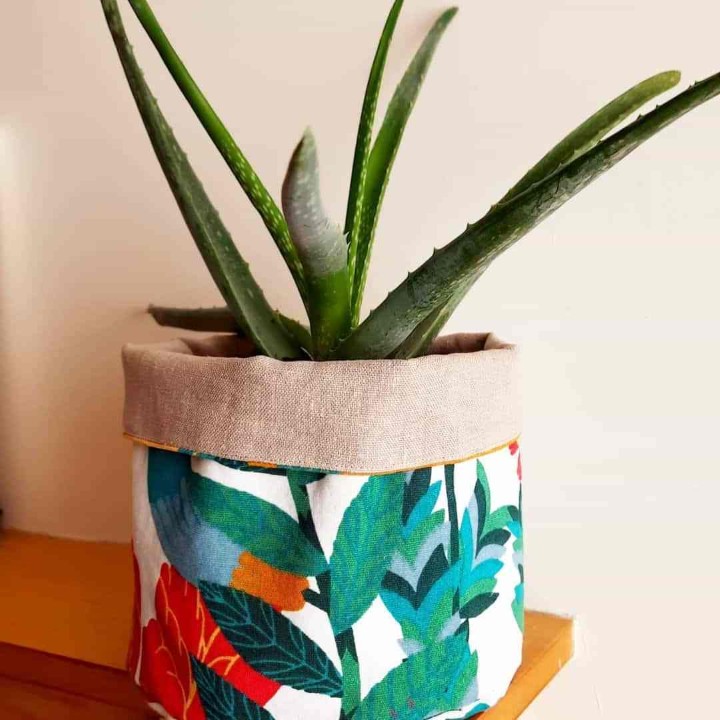
Rustic Twine or Rope Wrapped
If you love the “Boho” or rustic farmhouse look, paint isn’t your only option. Texture adds warmth to a room.
- The Technique: You need a hot glue gun and a roll of jute twine, sisal rope, or even thick yarn. Apply a bead of glue at the bottom of the pot and start wrapping the rope tightly around it, moving upward.
- Why It Works: It completely hides the pot underneath. This is a great way to “upcycle” an ugly plastic container or a chipped pot, giving it a brand-new, high-end life.
-
Decoupage (The “Mod Podge” Method)
Decoupage is the art of decorating an object by gluing colored paper cutouts onto it. It allows you to have intricate patterns (like detailed flowers or vintage maps) without painting them by hand.
- The Technique: Buy pretty paper napkins. Separate the napkin layers so you only have the thin top layer with the design. Brush a layer of Mod Podge (a glue/sealer) on the pot, place the napkin on gently, and smooth it out. Then, brush another layer of Mod Podge over the top to seal it.
- Result: It looks like the design was printed or painted directly onto the pot.
-
The “Aged” Stone Effect
Do you love the look of expensive, antique stone urns but only have cheap plastic pots? You can fake the look!
- The Technique: Mix your acrylic paint with baking soda. The ratio is roughly 1 cup of paint to 1 tablespoon of baking soda. This creates a thick, chalky mixture.
- Application: Brush it on thickly. When it dries, it looks like textured ceramic or concrete. You can layer gray and beige tones to create a faux-concrete industrial look.
Important Pro-Tip: Sealing Your Masterpiece
You have spent hours decorating your flower pot. The last thing you want is for the paint to bubble or fade after one watering.
Why Seal? Terracotta is porous; it breathes. When you water the plant, water seeps through the clay to the outside. This moisture pushes against the back of your paint, causing it to bubble and peel.
How to Seal:
- Inside: Before planting, spray the inside of the pot with a clear acrylic sealer or a waterproof sealant. This creates a barrier so water stays in the soil and doesn’t soak through the clay walls.
- Outside: After your decoration is dry, spray the outside with a clear UV-resistant sealer (glossy or matte, depending on your preference). This protects your art from sun fading and scratches.
Conclusion
Decorating a flower pot is more than just a craft project; it is an investment in your well-being and your home’s atmosphere. It bridges the gap between the responsibility of nature and the freedom of creativity. Whether you choose the sleek elegance of geometry, the playful vibes of superheroes, or the tactile beauty of rope wrapping, you are creating a custom home for a living thing.
Remember, the goal is not perfection. The goal is to create something that makes you smile when you look at your desk or window. If you are a beginner, start with the simple Face Line Handpainted method or the Button Pot. They are low-risk, high-reward, and incredibly fun.
Recommendations for Your Next Step (With Realistic Cost Estimates)
-
Start Small and Stay Intentional
One of the most common mistakes beginners make is going all in too fast—buying multiple pots, too many paint colors, and specialty tools before even finishing the first project. This often leads to wasted money and unfinished work.
A better approach is to start with one small terracotta pot. Terracotta is affordable, easy to paint, and forgiving if you make mistakes. Pair it with a basic acrylic paint set, which provides enough color flexibility without overwhelming you.
Estimated Cost (U.S.):
- Small terracotta pot (4–6 inches): $3–$6
- Basic acrylic paint set (6–12 colors): $10–$18
- One medium paintbrush: $2–$4
- Total starting cost: approximately $15–$28
This low entry cost makes the project approachable and stress-free—perfect for testing your creativity without commitment.
-
Scout the Space Before You Paint
Before choosing a color, take a moment to observe where the plant will actually live. Lighting conditions dramatically affect how colors appear and how much visual impact your painted pot will have.
- Low-light rooms (north-facing windows, shaded apartments):
Light-reflective colors like white, soft yellow, cream, or pastel lavender help brighten the space and make the plant stand out. - Bright, white, or minimalist rooms:
Dark tones such as matte black, navy blue, forest green, or deep plum create contrast and instantly elevate the room’s design.
Choosing the right color based on lighting isn’t just aesthetic—it’s interior design logic, and Google values content that shows real-world understanding like this.
Additional Cost (if buying extra paint color):
- Individual acrylic paint bottle: $2–$4
-
Turn It into a Shared Experience
Painting plant pots isn’t just a DIY project—it’s an opportunity to disconnect from screens and reconnect with people. This activity works exceptionally well for families, couples, or even small gatherings.
Children benefit from hands-on creativity, while adults often find the process relaxing and meditative. More importantly, it turns a simple object into something with emotional value, not just decorative value.
Optional Supplies for Group Painting:
- Extra brushes (pack): $5–$10
- Disposable table cover or newspaper: $0–$5
- Aprons or old shirts: usually free
- Added cost for group setup: $5–$15
-
Don’t Ignore the Saucer (This Is Where Most People Miss the Detail)
The saucer—the tray underneath the pot—is often overlooked, yet it plays a huge role in the final presentation. Leaving it plain can make even a beautifully painted pot feel unfinished.
Instead, treat the saucer as a frame:
- Paint it in a contrasting color to highlight the pot
- Or use a slightly darker shade of the same color for depth
- For modern interiors, try neutral saucer + bold pot
This small detail instantly makes your project look more intentional and “designer-made.”
Extra Cost:
- Paint used for saucer: usually included
- Additional clear sealer (optional, for water protection): $6–$12
- Total Estimated Cost Breakdown (Beginner Project)
| Item | Estimated Cost |
| Terracotta pot + saucer | $3–$6 |
| Acrylic paint set | $10–$18 |
| Brushes & basic tools | $4–$8 |
| Optional sealer | $6–$12 |
| Total | $23–$44 |
This price range makes painted plant pots one of the most cost-effective home decor DIY projects—low risk, high visual impact, and fully customizable.
Happy planting and happy painting! May your home be filled with fresh air and beautiful colors.